During the last class I taught at The Woodwright’s School, I think Roy got a little bored or restless. And so he asked: “Would you like me to make you a mallet?”
The answer was, of course, “Heck yes, please.”
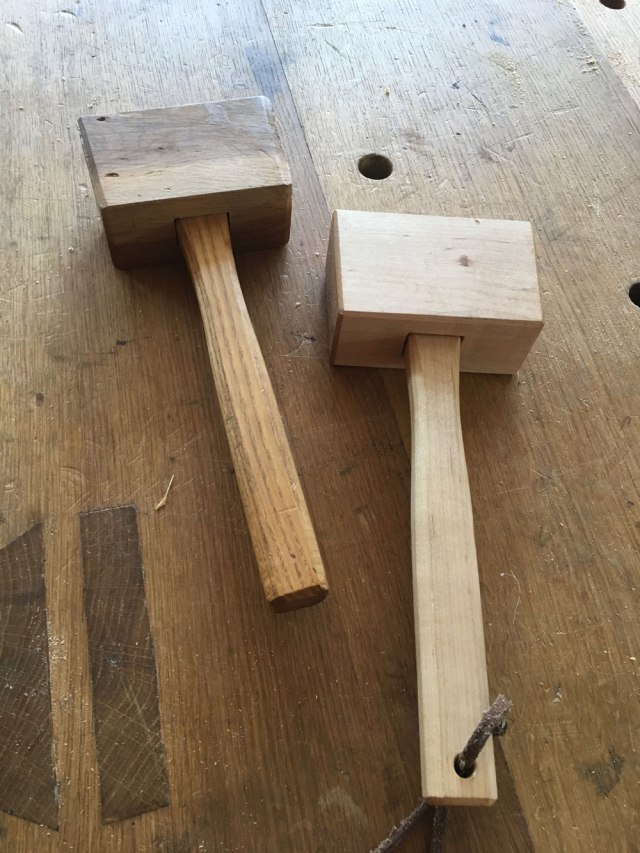
And so Roy spent an afternoon making a mallet for me out of a chunk of live oak (one of my favorite species) as I taught the 12 students to build a Dutch tool chest. After a few hours of sawing, mortising, rasping, chiseling and finishing, Roy presented the mallet to me.
It is, of course, one of my favorite objects. I have put it to good use and, thanks to a defect in the wood, I broke off a corner of the head. No matter. Tools should be used, and so I use the other face of the mallet’s head to hit things.


In case I destroy this mallet, I took some careful measurements and made a copy in maple. I call it the Son of Roy Underhill’s Mallet. It is identical in every regard except for the species of wood and the amount of use it has seen.
And because I have been too long away from this blog, I present the plans to you for Roy’s mallet. Free of charge.
Here are the sizes for the head and the handle:
Head: 2-3/8” x 3-3/8” x 5-3/8”
Handle: 1” x 1-5/8” x 14”
You can download a pdf drawing of the mallet here:
underhill Mallet
Here are a few details not discussed on the drawing.
- The striking faces of the mallet head are the same angle as the tapered mortise, approximately 2.1°.
- The chamfers on the handle are 1/4” x 1/4”.
- Chamfer the top and bottom of the handle. These chamfers are 1/8” x 1/8”.
- The grain of the handle and head should be dead straight throughout. And free of knots and defects.
- The mallet is finished with linseed oil.
It’s a mighty fine mallet. Balanced in the hand and to the eye. Making one takes an afternoon of pleasant work. And doing so cements your lineage to Roy.
— Christopher Schwarz