Asking a newly minted woodworker to build an Anarchist Tool Chest in five days is about like asking them to grow a tail.
During a five-day class, most students are working on the lid when we run out of time. This is somewhat frustrating for the students and myself because we both want the sucker done and ready to use.
One solution would be to add extra days to the course. But most students are so worn out after five days of high-pressure woodworking that the sixth day would be mostly nap time (we’ve tried it). There are other solutions I’ve pondered, all of which add time or cost or whatever. (This is my polite way of saying that I’m not looking for your suggestion to hold the class on Saturn, where the days are much longer.)
So this summer I have designed some different chests to build in 2015. One of the chests isn’t ready to unveil because it is part of a kooky-go-nuts low-cost new class I’m developing for 2015 (Hint: I hope you like the smell of B.O.).
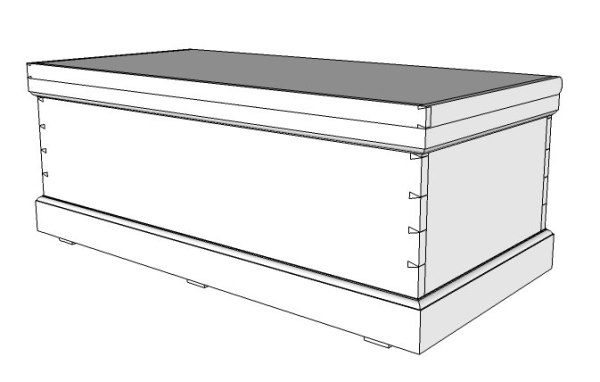
The other chest is designed and ready to discuss. This chest is basically the same size as the Traveling Anarchist Tool Chest, but it has some simpler joinery and an additional cool feature.
1. Fewer dovetails. Students have dubbed my Anarchist Tool Chest classes as a dovetail death march. I don’t disagree. This new chest replaces the dovetails on both the lower and upper skirts with miters.
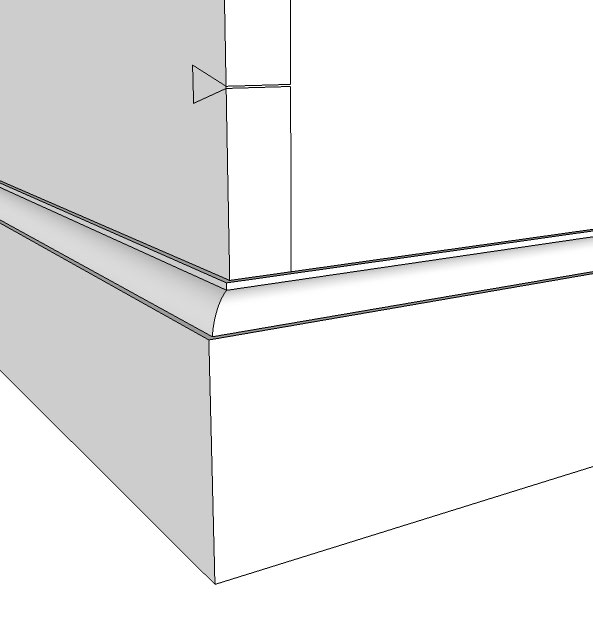
For the upper skirt, I think this is an overdue change. The upper skirt is a component of the chest that doesn’t see a lot of wear; it’s rare to see damage to this part of an old chest. Also, the upper skirt is now a three-piece assembly instead of going all the way around the carcase. This speeds assembly up and allows me to add a built-in stop for the lid (more one that in a minute).
Alas, the lower skirt does take a heap of abuse, so I resisted using miters here. Sure, I’ve seen miters survive just fine, but I’ve also seen them fail on old chests. So I’m recommending students add steel corner brackets, another feature I’ve seen on surviving tool chests.
2. A different lid. I love the lid on my old tool chest, but it has a lot of joinery and takes more than a day to build by hand for most people.
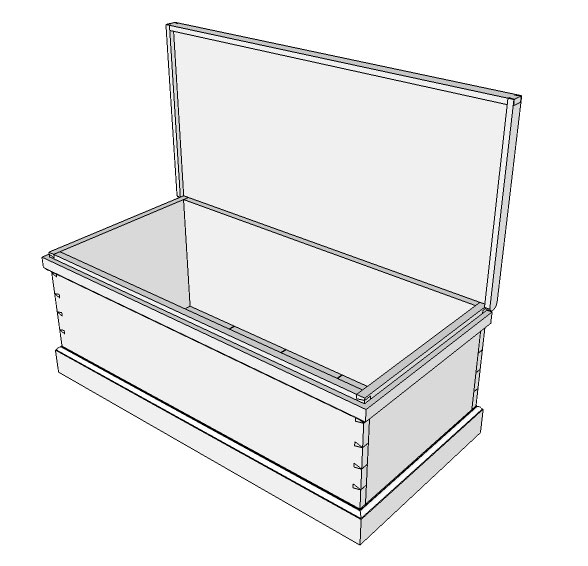
So here I’m using a lid design shown both in chests designed by Charles Hayward and Paul Hasluck. The lid is a simple flat panel with the grain running left to right. It is surrounded on three sides by a dovetailed dust seal (just like on my old chest). The flat panel is glued to the front of the dust seal and rabbeted into the ends. Cut nails keep the ends attached to the flat panel and allow it to move, pushing the wood movement to the back of the chest.

The other feature I like is that I have extended the width of the flat panel so it will act as a stop, keeping the lid upright when open. In the current drawing I have it open at 90°, but I can lean it back by planing a bevel on the lid.

This simpler lid also provides a nice canvas for a marquetry panel.
I’m still drawing out the interior of the chest, but it will be much like the Traveling Anarchist Tool Chest. There will be two sliding trays, a rack and two sawtills – one for panel saws and one for backsaws.
3. And finally, I have thinned down some components of this chest to make it lighter in weight, but still plenty strong. The thinner components – the bottoms, skirts and dust seal – are all things I’ve seen on old chests. Nothing new here. I’ve also thinned down the thickness of the carcase so that we can use off-the-rack white pine to save expense and reduce weight.
I’ve loaded my SketchUp drawing into the 3D warehouse. Be warned. This is the metric version. I’m not switching to metric. But I’m just back from England and I’m trying to train my brain to work better in metric. When I finish the Imperial version, I’ll post that as well.
— Christopher Schwarz