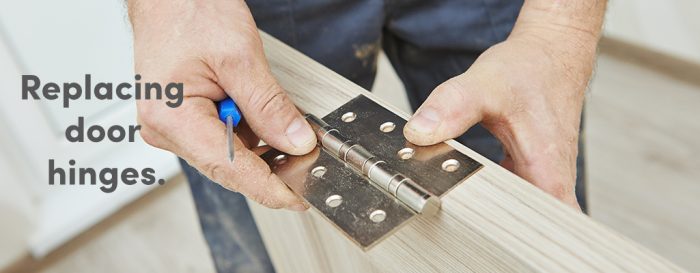
Whether you’re planning on some necessary maintenance on your doors or have decided to update your door handles or levers, replacing your door hinges is a great way to ensure all of your door hardware has the same finish.
It can be a simple job with the right tools and tips so if you’re new to this type of DIY, read on to find out all you need to know on how to replace your door hinges.
Choosing the Correct Type of Hinges
The type of door hinges you use will be dependent on the door you are working on.
- For doors you want to open easily up to 180 degrees, such as emergency or fire doors, you’ll need to install parliament hinges.
- Flush hinges are one of the most versatile hinge types and can be used for anything with a ‘flush’ or flat surface. This could be anything from cabinets to internal doors.
- Hard-wearing and made from strong, galvanised materials, tee hinges are generally used for external doors such as wooden doors or gates for the garden.
- Finally, double action hinges, sometimes known as spring hinges, allow a door to open up to 180 degrees in both directions and come back to center automatically.


How to Replace Door Hinges
What you’ll need:
- New hinges
- Blocks of wood or a sturdy door stop
- Screwdriver/Drill
- Tape Measure
- Sanding tool (not always needed)
- Paint (not always needed)
- Wood putty (not always needed)
Step 1. Support the door
First, wedge your door open so that the entire hinge is exposed using the blocks of wood or door stop. You won’t need to remove the door so these tools will ensure the door stays put while you replace the hinges.
Step 2. Check your measurements
Ensure that your new hinges match the old ones in both size and shape. This is also a good opportunity to check that the old hinges were in the right place. One should be placed seven inches from the top of the door frame and the other should be 11 inches from the bottom of the door frame; use your tape measure to check.
Most doors only require two hinges but if you are replacing hinges on a heavier door, which may need three hinges, the third will need to sit exactly in the middle of the two others.
Step 3. Remove old hinges
Starting with the upper hinge, remove the screws while holding the hinge into place. Pull the hinge leafs away from the door and jamb (the vertical portion of the door frame where the door is secured) and make sure the wood underneath is in good condition. If you find any holes, this is a good opportunity to plug them with a wedge of wood.
Step 4. Prepare the jamb and door for the new hinge
If the doors are old and the hinges have been there for a long time, you may need to do some repair work on the door and jamb.
If necessary, sand down the spot, then paint the area to match the wood. If the replacement hinges or screws are a different size to the old ones, you may also need to fill the holes in the door and door frame with wood putty. Allow plenty of time for this to dry and paint to match the wood.
Step 5. Install the new upper hinge
Place the new top hinge where the old one used to sit. Using a screwdriver or drill, secure the two sides of the hinge into place and place the hinge pin into the hinge.
Step 6. Repeat for the remaining hinge
Step 7. Test the new hinges
Remove the blocks or door stop from beneath the door, and open and close the door a few times to make sure it’s smooth and seamless.
All that’s left to do is stand back and admire your handiwork. We hope this blog has helped you with your DIY project. If you’ve decided to take on more of these home improvements for yourself, Leader Doors has all the necessary doors hardware and accessories you’ll need to get the job done.